Case Study: Create HDR Image In One Single Click
What Is HDR And Why Is It Different
HDR stands for High Dynamic Range Photography. It is a digital photography technique that uses image-editing software to layer multiple exposures of a picture and then merge them to create a more realistic image with dramatic enhancements.
It digitally enhances a photograph using Artificial Intelligence algorithms. A digital camera cannot record the required details in a single image. The HDR process combines several exposures to show a wide range of tonal values in a scene. Typically, landscape photography can capture unlimited F-stops of dynamic range in HDR.

From a layperson’s perspective, you can enhance images with HDR effects to get stunning pictures.
It is different from everyday photography as follows:
- It enhances images to get dramatic results.
- It uses Artificial intelligence (AI) to enhance.
- You need a fair amount of photo editing to enhance images.
- You will require a DSLR for elementary HDR or Photoshop skills for advanced HDR effects.
- It takes a minimum of three exposures to get a better HDR, unlike single exposure in everyday photography.
Create HDR Effects In Photoshop
If you want to use Photoshop to enhance images with HDR effects, you have to learn intermediate photo editing skills. With some control over the merged images, you can quickly get your job done. You can play around with parameters like edge glow, shadows, highlights, gamma, etc.
You may import the photos in Photoshop or add already opened files. You will get several presets to experiment with a bit. For instant results, you may stick to one of the presets. You can adjust the edge glow to use the correct strength of HDR effects. You may use the remove ghosts option to remove unwanted glows. You can also use Luminosity masks for professional photographic results.

Photography Bracketing
The first thing to create a perfect HRD photo is bracketing, meaning you must create several photos with different exposure settings. The photographer uses these photos to cover more of the dynamic range.
Merging Bracketed Photos into HDR
Photoshop allows you to blend all the photos with different exposure to create HDR pictures. Here are some simple steps.
- Put all photos into the layers.
- Select them all to merge.
- Go to Auto-Align images and Auto-Blend images.
- Stack them all.
You can also try some other third-party software like Photomatix, Aurora HDR, Lightroom, and they will provide amazing HDR preset effects, and you can apply them with a simple click.
How To Use AI To Convert One Single Picture To HDR Picture
All that may sound too technical. But there is a way out. You can use AI technology to create HDR online, instantly converting one picture into an HDR image. In simple steps, you can use the AI Image Enhancer tool online from the following website.
A Case Study
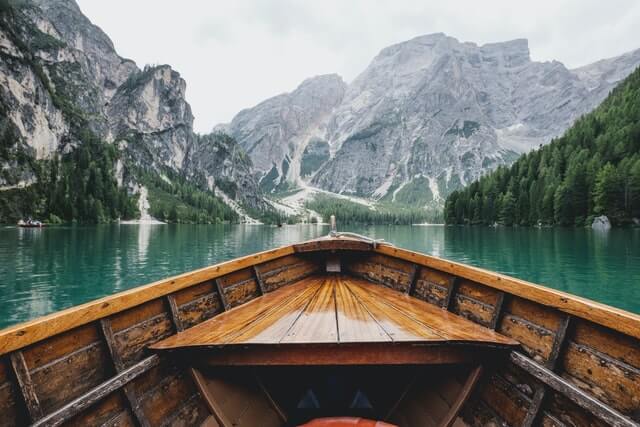
Here I would like to try a test and show the result of the HDR AI. I have downloaded a photo from Unsplash, and the original photo is like this.
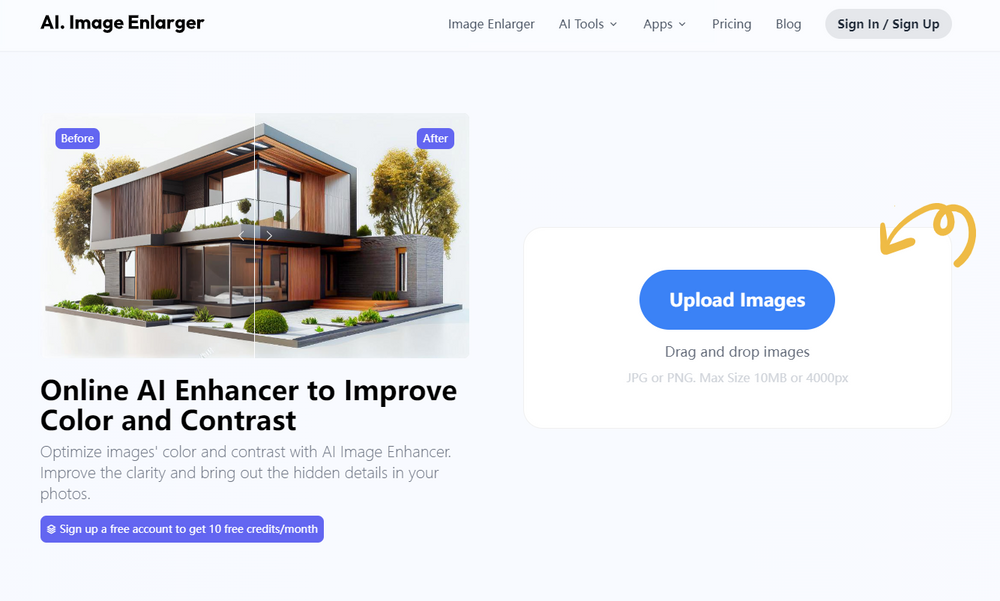
Then, go to Image Enhancer. Add the photo and select the HDR AI option. Upload and wait for the photo processing. After a while, you will find the download button shows up, just like the screenshot below.
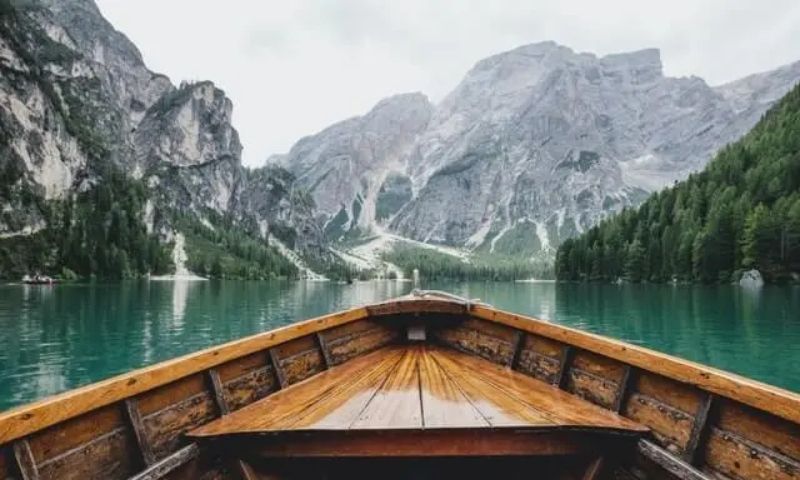
Here is the result of the HDR AI.

Magically, the size of the photo has been increased from 43.7 KB to 573 KB. That is because the colors and details get enhanced greatly.
Simple Steps Of Using Image Enhancer Of Imglarger
- Drag and drop an image to the window, or you can browse and upload the image by clicking the button. Please note that you can convert only PNG or JPG images with a max resolution of 2000 x 2000 or 5MB size for free of cost.
- You may test up to 8 images for free but need to subscribe to a paid plan for regular usage. If you are a subscriber, please log in with your credentials or use the free version without any login.
- After uploading the picture, it shows a thumbnail preview with two options: Normal AI or HDR AI. Select the latter option.
- Click Start to begin the conversion process. It will show uploading and processing indicators for a few seconds, and you are done. A download link appears. You can download and save the picture with HDR effects.

Benefits Of Using Image Enhancer
- It improves image color, contrast, and quality.
- This tool is swift compared to other HDR methods to save time.
- It works with a single click. You need not learn advanced Photoshop skills or use advanced masking techniques.
- It uses AI techniques to optimize the photo colors because the SRCNN neural network trains the tool.
- You can use it as a beginner.
- You do not need to adjust color balance, saturation, hues, or technical stuff. You can upload, and the AI robot automatically takes care of everything.
- You do not need to merge or bracket photos with different exposure settings.
- You can create stunning HDR effects on your photos with a single click in just a few seconds.
- You can create HDR online and do not need to download or use specialized software.
- You can share enhanced HDR images on your social media accounts immediately.

Conclusion
HDR Photography is a revolutionary technology to enhance photos dramatically. It essentially layers multiple exposures using advanced photo-editing techniques. But those who don’t want to get technical or can’t afford to spend too much time, energy, and money can use the online tool: AI Image Enhancer.
It is a fast, cost-effective, one-touch solution to save you from the hassles of learning technical skills, getting the best HDR effects, and creating HDR online.
AI image Enhancer is a game-changer online tool to experience HDR effects without learning advanced Photoshop skills.