How to Add a White Outline to Your Image: Four Methods Recommended

What is a White Outline around a Photo?
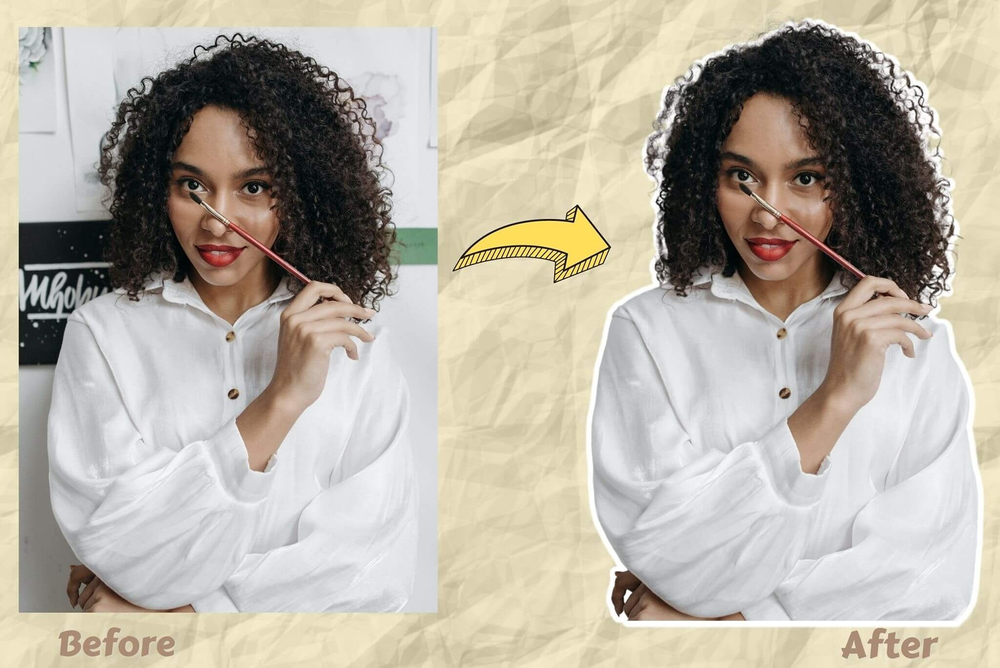
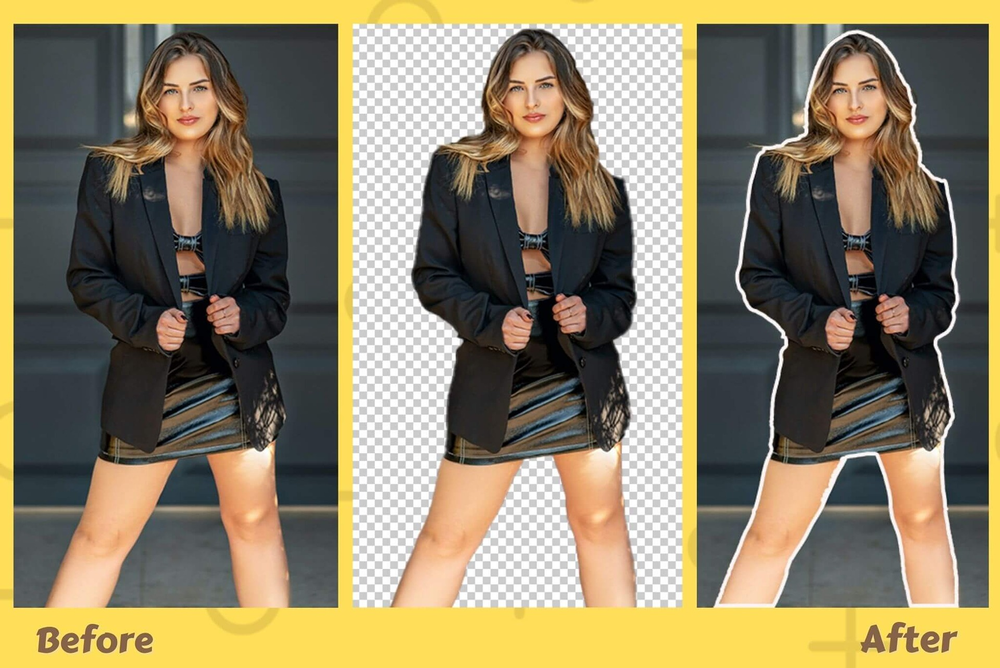
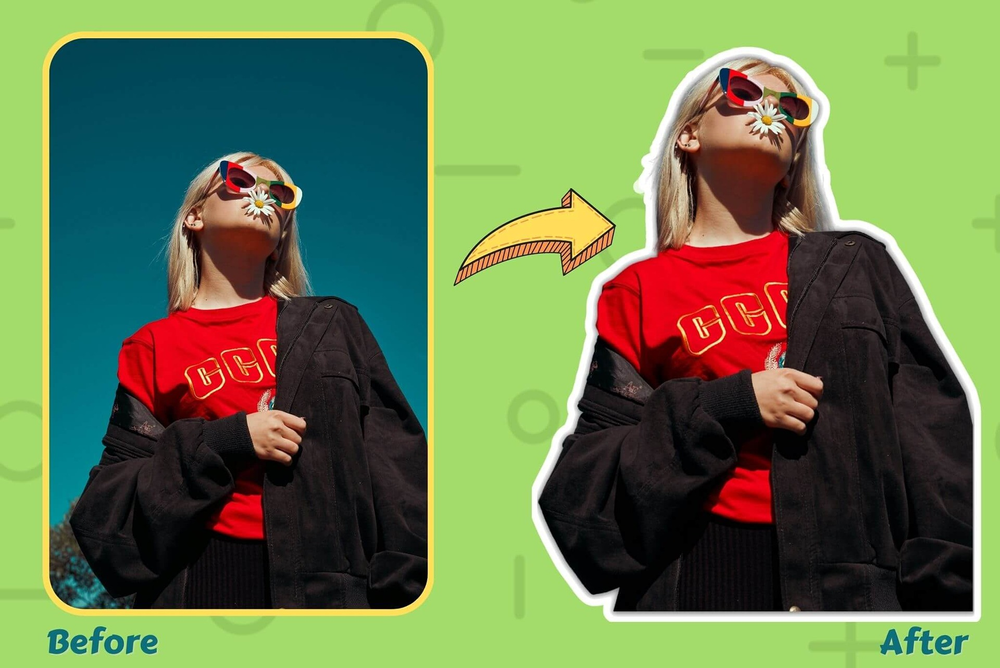
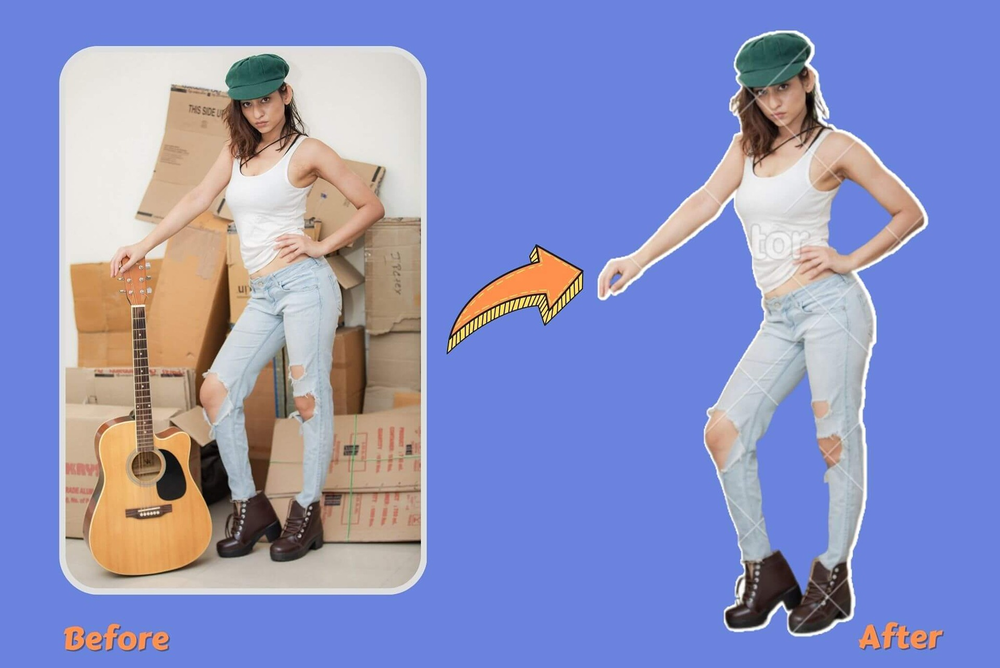
The white outline for pictures is a new photo effect that is very popular on Instagram. A white outline line is when the outline of a person or object in the subject of a picture is enhanced to white and thickened.
Why Add a White Outline to Your Image?
By adding white outline lines to the subject of the picture
- It can make the subject more prominent in the whole picture, and the factors in the picture are complex and diverse.
- The clever picture effect makes the picture more vivid, and the lines look smoother and more attractive to the eyes.
- Adding a white border to an object that looks more vitality and lovely. This process allows for more details to be found in the image editing process to add interest.
How to Add a White Outline to Your Image
Let’s see together how to put a white outline around an image.
Add White Outline to a Picture on Canva
Canva Overview
Canva is an online graphic design tool that makes it easy to showcase your creativity. It is very versatile to use, even for novice users. It is very famous among photo editing enthusiasts and is used by almost every photo editor or photo design enthusiast. Use it to showcase all kinds of creative ideas, publish and create social media posts, uniquely designed posters, high-quality videos, logos and a wide range of templates.
Add White Outline to a Photo on Canva
- Step 1: Upload images
Click “Edit Photo” then choose “Create a design” to upload the image.
- Step 2: Remove the background
After uploading a background image, click “Edit image” in the upper left corner of the action box and select “Background Remover” to automatically remove the background in a few seconds. Select “Apply” to apply the effect after removing the background.
- Step 3: Add a white border
Back to the “Edit image” page, click “Shadow” and select “Glow” effect. Click the icon above to adjust the parameters. Transpose the “Transparent” slider to the rightmost position to 100% and select the color white. “Size” and “Blur” can be adjusted according to your needs.
- Step 4: Save the image
Select “Publish” in the upper right corner and click “Download”, choose the file format you need and select the “Download” purple button to start. Download.
Add White Outline to a Picture Using Photoshop
Photoshop Overview
Photoshop is a well-known and powerful raster graphics design software and graphics editor. It is currently the most commonly used tool for raster graphics editing in professional digital art.
Photoshop also supports rendering and editing of vector graphics and text. Photoshop helps users to create, enhance or otherwise edit images, artwork, illustrations, etc. It supports use on mac OS and Windows.
Add White Outline to a Photo Using Photoshop
- Step 1: Add the image
Click “Crtl+O” to open the image.
- Step 2: Remove the background
In the toolbar, select “Quick Selection tool” and click “Select Subject” to intelligently identify and select the image subject. Then click “Select and Mask” and press “Ctrl+J” to copy the layer after removing the background.
- Step 3: Add a white border
Select the layer after removing the background, select “Layer” in the top navigation bar “Layer Style” and click “Stroke”.Set the “position” according to the picture and choose “opacity” at 100%. Set “Color” as Fill Color and select White for the selection body inset.
- Step 4: Save the image
Select “File” in the upper right corner and click “Save” or “Save as” to select the format and path of the image you want to save.
Use GIMP to Add White Outline Around an Image
GIMP Overview
The full name of GIMP is GNU Image Manipulation Program. It is a free, open-source raster graphics editing tool. It can be used for free-hand drawing, graphic design, image editing, retouching, image format conversion, and many more features. It can be used for Linux, macOS, and Windows.GIMP can meet the general functions of image processing. Compared to Photoshop, it is more suitable for daily use.
Add White Outline to a Photo Using GIMP
- Step 1: Upload an image
Upload an image with the background removed and go to “Layer” > “Transparency” > “Alpha to Selection”. We see dashed lines appear in the area around the subject.
- Step 2: Create a new layer
Create a new layer named “White Outline” and click “Grow” in “Select” to fill in the number ’20’. You can adjust according to your own. Place the new layer below the original layer.
- Step 3: Fill in New Layer
Put the “White Outline” layer under the original layer, click “Edit” and “Fill with BG color”, and we will see the preview. The body of the character is white.
- Step 4: Save the image
Click “File” in the “Save” or “Save as” to the target bit folder to view.
Outline an Image with Fotor Editor
Fotor Editor Overview
Fotor is a fun photo editing and design tool, and you can use it online or download it to your desktop. Users can design images, edit photos and apply various stickers to showcase creative ideas in Fotor.
Whether you want to create invitations, eye-catching posters, or business cards, you can use Fotor to do it all. Fotor also supports sharing your edited images on social media such as Facebook or Instagram to record your creative designs.
Add White Outline to a Photo Using Fotor Editor
- Step 1: UploadSelect “Upload” to upload images or drag and drop to upload.
- Step 2: Background RemoverSelect the “Bg Remover” tool to automatically remove the background of the image leaving the main body.
- Step 3: Add white outlineSelect “Edit image” in the “image Style” to add the effect of the white frame, choose the color “white”.
- Step 4: SaveSelect “Download” in the upper right corner. You can choose the image save format and size needed to upgrade the account.
The Tool That I Love Most
- Operation process
Photoshop is a very professional tool, but it is also very simple to add white outlines. The “Quick Selection Tool” simplifies the traditional complex keying operation. Photoshop and Gimp require downloading the application to your computer and do not support online operation. Canva and Fotor both support online operations and the process is simple and similar. These two tools are similar, but after adding the white outline effect to the picture canva can be adjusted the parameters of the outline. Gimp is a bit more complicated in its operation process than the other three tools. I downloaded the application from the official website and installed it on my computer, and it didn’t work so well, it always flashed when I opened it.
- Price
Canva and Gimp are free to use, while Photoshop supports the trial of Fotor, which requires a paid purchase plan. Canva is free to use, but the limited choice of features and templates does not affect the normal use of the elements. Fotor is different in that it allows users to try out some of its features. If you want to export photos, you need to buy a plan, which is very inconvenient for users.Compared to Gimp I prefer Canva, which supports online operation, which makes the whole process very easy from the beginning.
- Interface
The interface of canva and fotor is more simple and flexible. Photoshop’s many functions and various toolbars are more professional and complex than Canva and Fotor. Gimp’s interface is more traditional and retro. After combining the above aspects with the experience, Canva is the most convenient to use. Secondly, Photoshop’s effect is also very precise, and due to its professionalism, users can adjust more parameters. Photoshop is also a good choice for users who like to customize and tend to customize.
Conclusion:
When we see an interesting picture, it stimulates our curiosity. We went back to explore how to get the same effect on the picture. It is very popular on social media to add white outlines to the picture's subject in different styles. Some highlight the person in the picture. Others highlight an object in the picture.
A simple smear around it makes the whole photo come to life. Smooth lines also have interesting shapes, and we can explore more details in the picture. This effect can be easily achieved with these photo editing tools. You can choose according to the analysis in the article and combine it with your own preferences. Now you must be eager to try it. Let’s edit your own pictures to see the effect!