How One Image Becomes Five AI Videos: A Practical Workflow for Turning Static Assets into Multi-Platform Content
Learn how to turn one image into five AI videos for product pages, TikTok, Reels, ads, and more with a practical image-to-video workflow.
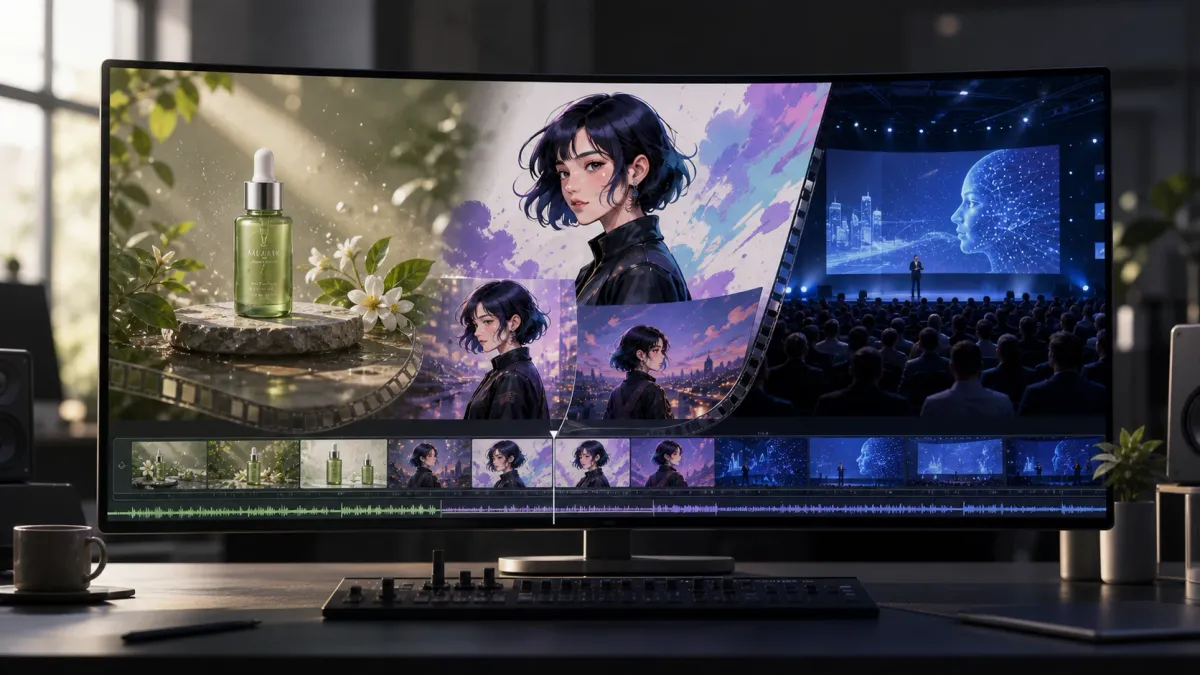
In the past, making a product image move usually required a studio, an animator, an editor, and several days of production. Even a short social media video involved scripting, shooting, editing, and multiple rounds of revision.
AI video is changing that process. A clear product image, portrait, illustration, or event poster can now become the starting point for several short videos. The real value, however, is not simply adding a zoom effect. It lies in turning the same static asset into distinct video versions with different shots, pacing, and purposes for different platforms and campaign goals.
This approach is especially useful for ecommerce brands, creators, SaaS teams, and marketing agencies that already have large image libraries but limited video footage.
Why One Image Should Produce More Than One Video
Brands often need content for several platforms at the same time. A new product may require:
- A landscape showcase video for the product page;
- A vertical short video for TikTok;
- Lifestyle content for Instagram Reels;
- A feature demonstration for YouTube Shorts;
- Multiple variations for paid-ad testing.
Reshooting for every platform quickly increases cost and production time. A more efficient approach is to use an image to video tool to turn one high-quality image into a visual master, then build several video versions around it.
For example, a product photo of a sneaker can become a slow rotating showcase, a fast push-in ad opener, a lifestyle scene, and a seamless looping animation. The subject stays the same, but each video has a different job.
Step 1: Choose an Image That Can Support Motion
Not every image is a strong starting point for AI video. The ideal reference has a clear subject, well-defined edges, and enough surrounding space for movement.
Before selecting an asset, check whether:
- The subject is cropped by the edge of the frame;
- Faces, hands, and clothing look natural;
- Product packaging and structure are accurate;
- The image resolution is high enough;
- The background is overly complex;
- There is room around the subject for motion;
- The direction of light and shadow is coherent.
Blur, clutter, and structural distortions often become more visible once an image starts moving. Before generation, it may help to upscale and sharpen the asset, reduce noise, clean the background, and extend the canvas.
Once the reference image is ready, creators can use Seedance 2.5 AI to explore image-to-video production and turn a static visual into short-form footage with subject movement, camera motion, and scene changes.
Step 2: Define the Purpose Before the Motion
A common mistake is to make the image move at random and only later decide where the video might be used. A stronger workflow reverses that order: define the communication goal first, then design motion that supports it.
A product-page video should be steady and slow enough for viewers to understand the item. A short-form ad must earn attention in the first two or three seconds. A brand-story video can place greater emphasis on environment, emotion, and rhythm.
Before generation begins, the team should decide:
- Which platform will publish the video;
- Whether the format is landscape, portrait, or square;
- How long the video should run;
- What viewers should notice first;
- Which visual elements must remain unchanged;
- Whether subtitles, a logo, or narration will be added in post-production.
These choices directly shape the generation strategy.
Five Videos You Can Create from the Same Image
1. A Cinematic Product Showcase
This format works well for product pages, brand websites, and new-product launches.
The subject can remain relatively stable while the camera slowly moves closer, circles the product, or rises from a low angle. Lighting may shift slightly, but excessive background motion should be avoided.
For example, an image of a perfume bottle could become a shot in which:
- The camera slowly pushes in from a distance;
- The bottle makes a subtle rotation;
- Light sweeps across the glass surface;
- The background develops a gentle depth-of-field shift.
The goal is not to create a complicated story, but to present the product clearly, elegantly, and with a sense of material quality.
2. A Fast Social Media Opener
TikTok, Reels, and YouTube Shorts need to capture attention quickly. Compared with a product-page video, a social-first version can use faster camera movement and more visible changes.
A static product image can become an opening shot through:
- A rapid push toward the subject;
- A transition from blur to sharp focus;
- A pullback from a close detail to the full product;
- A sudden change in background color;
- The subject entering the center of the frame from outside the shot.
The generated shot does not need to be long. Three to five seconds is often enough for an opener. Titles, feature callouts, or real usage footage can then be added during editing.
3. A Product-in-Use Scene
A clean product image can also be expanded into a realistic usage environment.
For example, a coffee machine photographed without a background can be placed in a modern kitchen, an office break area, or a small cafe. The video might show morning sunlight entering the room, steam rising gently, or the camera moving from the wider environment toward the product.
The value of this format is that it helps viewers understand how a product fits into real life rather than showing it as an isolated object.
To preserve credibility, background motion should support the product. Strong environmental changes can distract viewers and may even distort the product itself.
4. A Seamlessly Looping Motion Clip
Looping videos work well as website backgrounds, digital advertisements, trade-show displays, and social posts.
These videos usually rely on one simple repeatable action, such as:
- Light and shadow moving slowly across the product;
- Hair or clothing shifting gently;
- Particles drifting continuously in the background;
- A very slow camera push-in and pullback;
- Liquid or smoke moving in a continuous flow.
A loop does not need an obvious beginning or ending. The first and last frames should connect as naturally as possible to reduce a visible jump when playback repeats.
5. Variations for Different Markets
The same image can also support seasonal, regional, or audience-specific video versions.
For example, one general product image could be adapted into:
- A summer outdoor scene;
- A holiday-light setting;
- A clean business environment;
- A youth-oriented social media scene;
- A premium studio treatment.
The subject does not need to change. Most variation can happen in the environment, lighting, and pace. This allows a team to preserve a consistent product identity while testing different creative directions across markets.
Text, prices, and calls to action are best added in post-production instead of being generated directly by the model. This reduces spelling errors and makes multilingual versions easier to create.
Step 3: Separate Subject Motion from Camera Motion
A video typically contains two kinds of movement:
- Subject motion: a person turns, a product rotates, clothing moves, or an object changes position.
- Camera motion: the camera pushes in, pulls back, pans, orbits, rises, or descends.
When both types of movement change too aggressively at the same time, subject distortion, background flicker, and a confused visual focus become more likely.
For an initial generation, choose one type of movement as the primary action. For example:
- Keep the product still while the camera slowly orbits;
- Keep the camera steady while a person turns slightly;
- Give the subject one simple action while the background remains still;
- Allow a subtle environmental change while preserving the product's structure.
Once the result is stable, add other movement gradually. Changing one variable at a time also makes it easier to determine whether a problem comes from the reference image, motion description, or camera direction.
Step 4: Build the Video from Short Shots
Generating one long video is usually harder to control than generating several short shots. As duration increases, faces, product structure, and background details are more likely to drift.
A more reliable approach is to divide a 15-second video into three shots:
- Opening shot: establish the scene quickly and attract attention.
- Main shot: show the product, person, or primary action.
- Closing shot: present the result and leave space for copy or a call to action.
Each shot should perform one task. An online video creator can then be used to adjust order, speed, and transitions, and to add music, captions, and logos without installing software.
If the second shot does not work, only that section needs to be regenerated. There is no need to rebuild the entire video. This modular workflow also helps teams swap openings and endings quickly for different platforms.
Three Practical Use Cases
Case 1: Turning One Product Image into Five Ads
A skincare brand has only one studio image of a new serum. The team removes the original background, sharpens the bottle edges, and extends the canvas to create room for a vertical composition.
It then produces five versions:
- A product-page video with the bottle rotating slowly;
- A social opener that pushes quickly toward the bottle;
- A usage scene with the product on a bathroom counter;
- A looping showcase with watery light moving in the background;
- A seasonal campaign version with holiday lighting.
Finally, the team adds the real logo, product name, and captions in post-production. All five videos use the same product image, but they serve the website, social media, and ad testing in different ways.
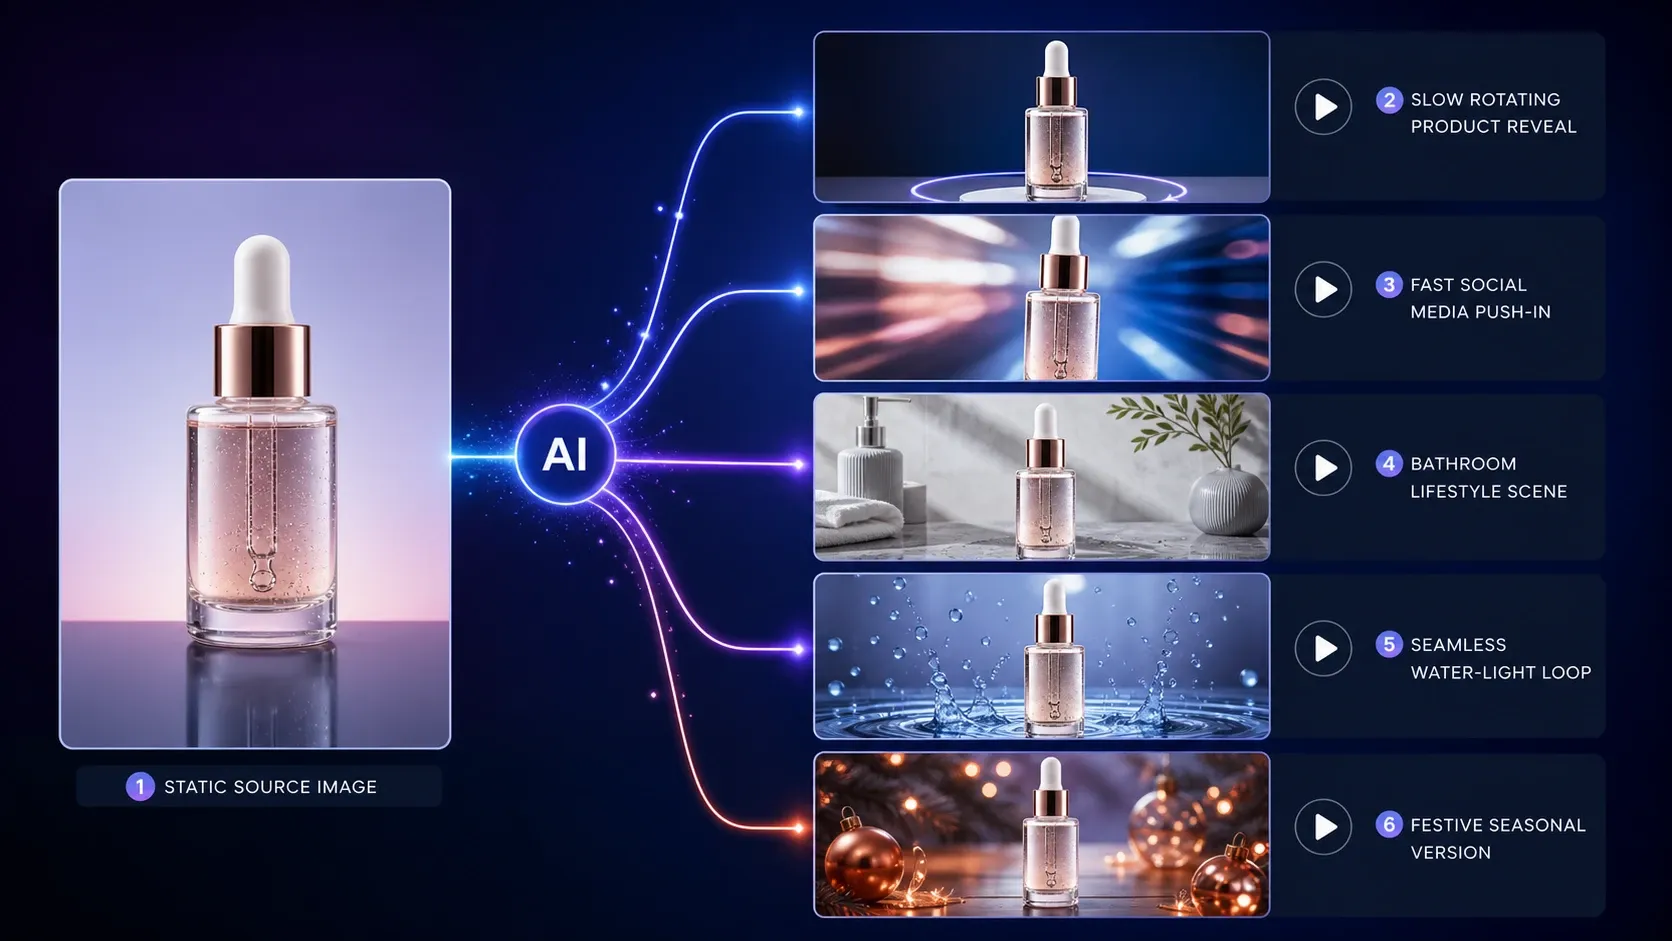
Figure 1. One skincare image transformed into five AI-generated video variations
Case 2: Animating a Consistent Illustrated Character
An illustrator wants to turn a static character design into short videos without noticeably changing the character's appearance.
The creator begins with an image that clearly shows the face and full body, then produces separate shots featuring:
• A subtle blink and head turn;
• A camera move from the full body toward the face;
• Hair and clothing moving in the wind;
• A gradual change in background lighting;
• A breathing motion designed to loop.
Each video contains only one primary movement, reducing the risk of changes to facial features or clothing. The creator then uses the clips for character introductions, story teasers, and social updates.
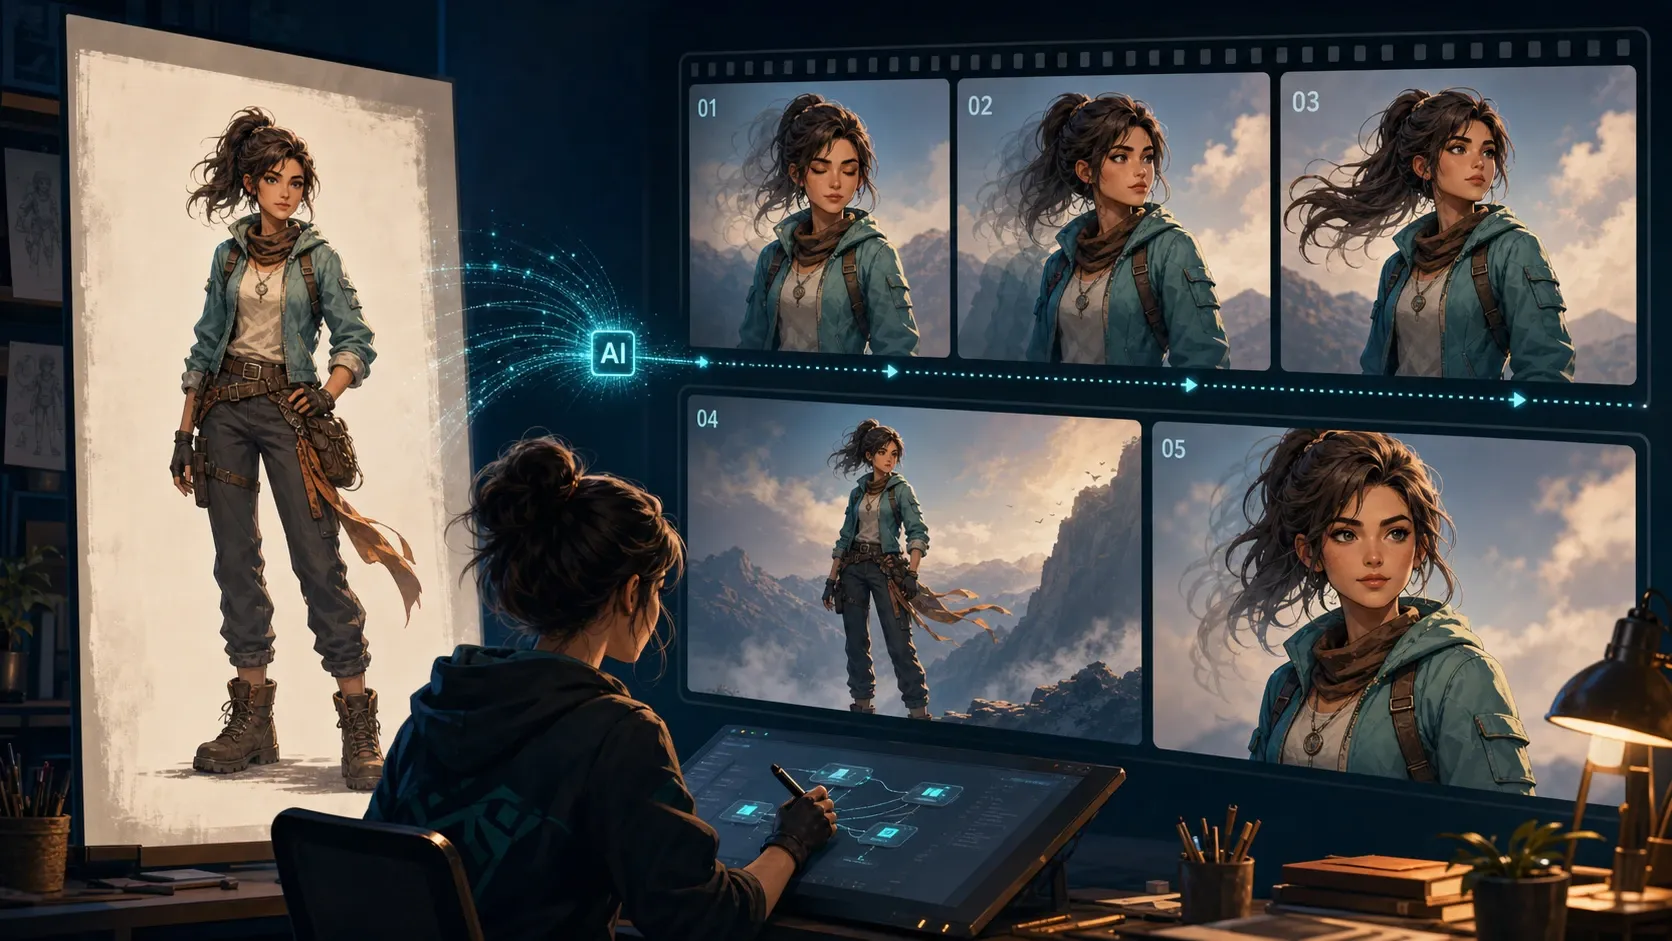
Figure 2. The same illustrated character remains consistent across multiple AI video shots
Case 3: Turning an Event Poster into a Promo Video
An event team has only the main visual poster and no additional filmed footage.
The team separates the person, title area, and background, then generates several short shots in which:
- The camera moves through the background into the main visual;
- The person makes a subtle movement;
- Lights and particles move in the background;
- The final shot settles on an area of negative space.
The event name, date, and ticket information are not added during generation. They are typeset accurately during editing. The final video preserves the original poster style while working well on social media and digital displays.
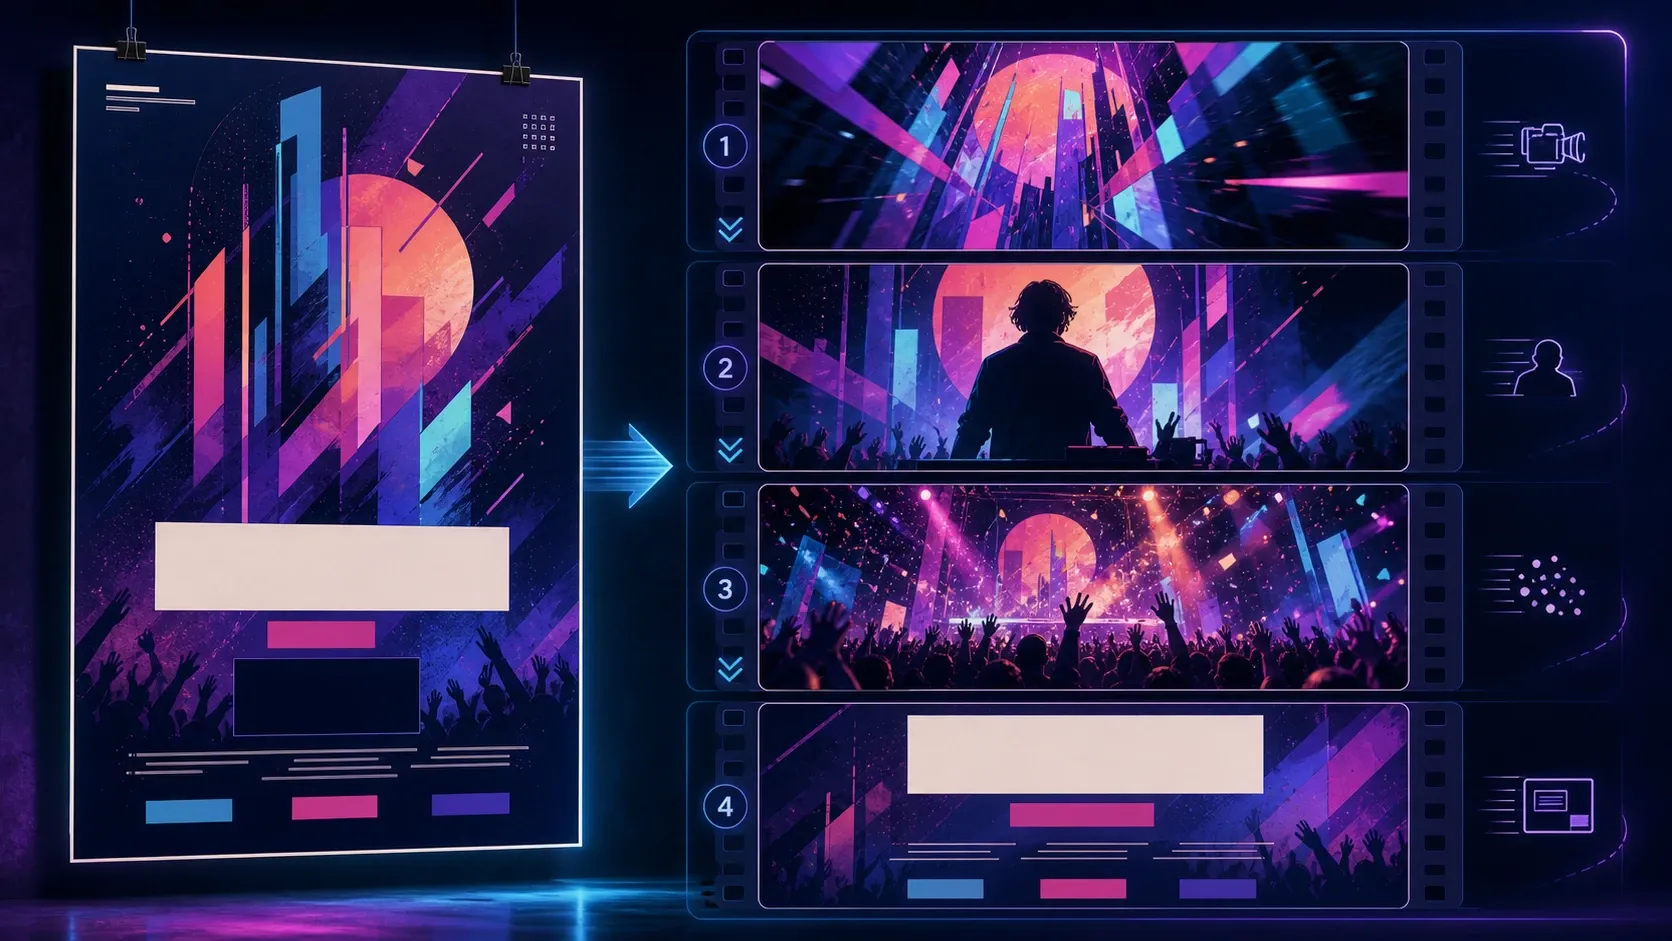
Figure 3. A static event poster transformed into a sequence of AI promotional video shots
Step 5: Protect Brand Information in Post-Production
AI-generated footage should not be treated as the final deliverable. Post-production is still responsible for brand accuracy and clear information.
Add the following during editing:
- The brand logo;
- The product name;
- Accurate packaging copy;
- Captions and narration;
- Background music and sound effects;
- Prices and campaign dates;
- Calls to action.
If product packaging contains small text, consider softening that area before generation and overlaying a clear version afterward. This is more reliable than asking the model to preserve every letter accurately throughout motion.
Common Mistakes
Making Every Element Move at Once
Aggressive simultaneous changes to the subject, camera, background, and lighting increase the chance of losing control of the shot. Define one primary movement first.
Generating Shots That Are Too Long
Long shots are more likely to produce changing faces, distorted products, and background flicker. Generate shorter shots first, then combine them.
Ignoring the Publishing Aspect Ratio
Converting a landscape image directly into a vertical video can crop the subject. Extend or recompose the image before generation.
Generating Important Text Inside the Video
Packaging copy, logos, and prices are easy to distort. Add accurate information during post-production instead.
Creating Five Versions That Only Change the Background
A true video variation needs more than a new backdrop. It should have a distinct opening, camera rhythm, and communication purpose.
Pre-Publishing Checklist
- Does the aspect ratio fit the target platform?
- Does the subject match the reference image?
- Are the product structure and brand colors accurate?
- Do faces, hands, and clothing look natural?
- Is the camera movement smooth?
- Does the background contain flicker or sudden changes?
- Are the logo and text clear?
- Do you have the rights to the music, fonts, and source materials?
- Is the opening immediately understandable?
- Does each version have a distinct purpose?
Conclusion
The value of one image is no longer limited to a single web page or social media post. With deliberate subject motion, camera movement, and scene changes, the same static asset can support product showcases, social media openers, usage scenes, looping animations, and localized advertisements.
The goal is not to make an image move as much as possible. It is to give every video a clear purpose. By preparing a reliable reference, breaking complex ideas into short shots, and adding accurate brand information in post-production, teams can build a more flexible short-form video system with fewer source assets.